My apologies for another late post, but here it is! I was looking for a couple of lip products to review, and the Revlon Color Burst Lip Butter caught my eye. I thought I'd give it a whirl, so I picked up Tutti Frutti to try it out. You may have read in previous entries about my obsession for orange lippies... Pics after the jump!

Showing posts with label Get The Look. Show all posts
Showing posts with label Get The Look. Show all posts
Tuesday, February 28, 2012

Monday, February 13, 2012
Valentine's Day!
Okay, guys! Here's my Valentine's look... It's pretty simple. I started with moisturizer all over my face, then used UDPP on my eyelids. I curled my lashes, and lined my lower lashline and waterline with a brown pencil. I covered my entire lid up to my browbones with Pink Eye from My Pretty Zombie, using a bit in the inner corner as well to brighten the eyes. Then, I worked Kiss Me Quick from MOI Minerals into the crease. I lined my upper and lower lashline with Kink from Rock A Betty Beauty, and worked a tiny bit into the outer corner. I applied black mascara to finish the eyes. Next, I applied Lancome Blush Subtil in Aplum to my cheekbones. On my lips, I applied a small amount of Tarte Lipsurgence Lip Tint in Enchanted, and topped it off with Lancome La Laque Fever in Glitterstick. Pics after the jump!
Monday, October 3, 2011
Facebomb Cosmetics Swatches + Review
The Shop: Facebomb Cosmetics
What I ordered: A Random Grab Bag (not available to link at the time of this post)
Packaging: I placed this order 9/12/11, and it arrived 9/17/11 in a bubble mailer. Inside the bubble mailer was a cute little cellophane bag tied with ribbon, and a copy of my invoice with an ingredients list stapled to it. I got two colors in jars and three samples in baggies.


Today's Swatches:


These swatches were done on bare skin (top row,) and skin prepped with primer (bottom row. It's UD Primer Potion or MBA Shadow Poxy, but I prepared these weeks ago so I honestly don't remember which one I used.) I made an additional swatch of Electric Avenue over primer with Fyrinnae's Pixie Epoxy. Here's a few shots of a quick look I did with them.


Overall: These shadows adhered pretty well to my bare skin, which is a plus, but the primer set them off exponentially. And my order shipped really quickly, to boot! The look I did was pretty soft, but overall these colors are pretty intense with a good deal of sparkle. Link is a sparkly deep, olive-forest green. Powder Keg is a sparkly bright blue. Electric Avenue is a sparkly, glittery medium purple. P.S. I Love You is a sparkly frosty pink that reminds me of cupcakes. Lollipop Chainsaw is a shimmery white with blue glitter. The only thing that I didn't like was the generic ingredients list stapled to my invoice; I would prefer to have individual lists on my jars so I know exactly what's in each pigment. Shipping was fast, the colors are interesting, and they blend quite well.
Would I recommend them?: Absolutely.
Monday, September 5, 2011
FOTD: My Face But Better
I see a lot of people talking about a shade of lipstick or gloss that's supposed to be "your lips but better," so I decided I should take that one step further and do a whole look based on the "_____ but better" philosophy: natural-looking and simple, not cakey or obvious. The first thing I did was curl my lashes and apply mascara. I use black since my brows and lashes are quite dark already, but if you have lighter brows and lashes, you may want to use brown for this look instead. The next thing I did was use a white pencil on the inner corners of my eyes to highlight them. If you have darker skin, you can opt for gold as a highlighter instead to keep your look tame. I lined my eyes top and bottom with a dry neutral mineral shadow, Amber Dust from TSC. I lined my lips with an NYX Peekaboo Neutral lipliner pencil, filled them in with NYX Diamond Sparkle Lipstick in Sparkling Beige, and put a clear gloss over the top. I finished by applying mineral eyeshadow to my the apples of my cheeks and the bridge of my nose as blush; I used TSC's Petal. Again with the lips and cheeks, if you have a darker or lighter skintone, these colors may not work as a neutral for you, so choose your colors accordingly. I did not use any foundation, or primer, or concealer for this look, so my freckles show through, the darkness under my eyes is more apparent than if I had a full "face" on, etc. but it's supposed to look natural, right?
Pictures today from my new camera! I decided on the Sony Cyber-Shot DSC-W530 based on reviews, price point, and a perusal of images on Flickr. I'm pretty happy with the quality I've seen from my shots so far, and I'd say that it's well worth the money for $100 on sale at Best Buy. You can click on any image to enlarge; the only editing that has been done to these photos is cropping.

Lip Stuff


Whole look


Close-up Eyes

Close-up Lips
Monday, August 8, 2011
Bonus Post: Random Look
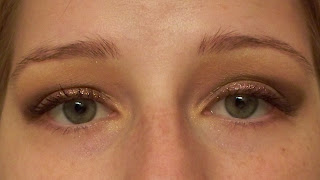
This look is easy-peasy. I started with UD Primer Potion as a foundation, and used a small amount of Bouffant from LC on the inner corners of my eyes and under my brows as a highlighter. I applied Bare from TSC on my lids, and used LC's Sprightly to cut the crease. I lined with Buried Alive glitter blend from RABB. It was a little hasty, so don't mind the lack of blending; I'll fix it up and post more pictures shortly.


Friday, August 5, 2011
Bonus Post: Random Look
Here's another look for you, my lovely readers! Today's look is sort of a peacock color scheme featuring three colors from The Starshine Company. Very bright and bold... Enjoy!
The look is fairly similar to Monday's. I started with a layer of Urban Decay Primer Potion, and highlighted my inner corners and brows with Bouffant from Linnaeus Cosmetics. I started by patting Golden Green onto my eyelids with a large detailer brush. Next, I switched to my small detailer brush and started a cut crease using Mint Candy out about halfway over my eyelid. I continued with my small detailer and completed the cut crease with Sea Foam, blending the two colors together where they met in the center. I created an arc shape and rounded the outer edges of the cut crease. My lower lashes are lined with Golden Green on the inner half, and Sea Foam on the outer half. I finished the look by curling my top lashes and applying mascara (I left my lower lashes bare.)


Monday, August 1, 2011
Random Look!
But first, my trip to Ulta! Ulta is the closest beauty store to me with the best variety of products. Most of the other stores near me are dreadfully small, do not carry what I was looking for today, or both. I ended up getting the Japonesque touch-up tube (five basic brushes for $20) and a tube of Urban Decay Primer Potion in Eden ($18). I looked around for a bit, but I thought the primer potion was enough of an impulse buy for the night and checked out.
The brushes are really soft. I would have liked the assortment better if it had included an angled liner brush instead of a lip brush, but it wasn't a dealbreaker. They ended up being $4 a pop, and they are definitely much softer than the $6 or $7 double-sided liner/shadow brush I had before. I think I'll really enjoy using them.
This look was created entirely with shadows from The Starshine Company (which you should definitely check out if you haven't already!) over Urban Decay Primer Potion. A little bit of the UD primer goes a looong way, and it's WAY less forgiving than MBA's Shadow Poxy; it dries completely to a matte nude finish and anything you apply gets sucked right in. There is NO room for error, which I learned the hard way with this look. Sorry about the unevenness! I started the look with Cheek to Cheek on my lids, applied using the large eye detailer. Then I did a cut crease with Wine using the small eye detailer, which I rounded out at the outer corners of my eyes. I went back to my large eye detailer and applied Petal lightly as a highlighter at the inner corners and heavily under my brows. I lined my upper and lower lash lines with Purple Rain using the lip brush. I finished by applying mascara to my upper and lower lashes.

Closed Eyes - With Flash

This eye kind of sucked; feel free to ignore it...

Left side, eyes closed - Without flash

Left side, eyes slightly open - Without flash
Oh, and the color in the photos does NO justice to these shadows. Cheek to Cheek is this incredible hot pink. Think awesome 80's neon pink (but eye-safe!) And petal is lighter, and slightly more coral, but definitely similar enough to compliment really well. Wine is NOT a straight-up purple like Purple Rain, it's more of a deep fuchsia, not quite pink OR purple. The color is definitely more accurate without the flash, but you really have to see the colors for yourself; they are gorgeous.
Wednesday, June 22, 2011
Random Look!
This design features some new colors I have received this week, which I will be swatching and reviewing in the weeks to come. So here it is!
I used Temple of Time from Shiro Cometics as a highlighter in the corners of my eyes and under my brows. I then applied Lanky from Linnaeus Cosmetics on the inner half of my eyelids, and Kink from Rock A Betty Beauty on the outer half, overlapping the colors and blending at the center. Next, I used Cavort from Linnaeus Cosmetics on the outer portion of my crease, and Mondo From Linnaeus Cosmetics on the inner portion, blending the shades together just outside the center. I then foiled black pressed liner and applied mascara to my upper and lower lashes (I usually skip the lowers, but I showed them some love tonight.) When I finished this, it reminded me of a less intricate version of Snarky P.'s nearly-neon eyes, but the color scheme was sheer coincidence. Kink was the color that really got me excited about doing a look tonight (it reminds me of a nail polish I had in junior high called "Barney",) and I wanted it to be bright and fun, so this is what I came up with...


I used Temple of Time from Shiro Cometics as a highlighter in the corners of my eyes and under my brows. I then applied Lanky from Linnaeus Cosmetics on the inner half of my eyelids, and Kink from Rock A Betty Beauty on the outer half, overlapping the colors and blending at the center. Next, I used Cavort from Linnaeus Cosmetics on the outer portion of my crease, and Mondo From Linnaeus Cosmetics on the inner portion, blending the shades together just outside the center. I then foiled black pressed liner and applied mascara to my upper and lower lashes (I usually skip the lowers, but I showed them some love tonight.) When I finished this, it reminded me of a less intricate version of Snarky P.'s nearly-neon eyes, but the color scheme was sheer coincidence. Kink was the color that really got me excited about doing a look tonight (it reminds me of a nail polish I had in junior high called "Barney",) and I wanted it to be bright and fun, so this is what I came up with...


Monday, June 13, 2011
Double Look Day!
For my first look, I primed my lids with Shadow Poxy from My Beauty Addiction, then did a rainbow consisting of Show Off, Bombastico, Flutter, Hold Fast, Mondo, Matriarch, and Kitsch from Linnaeus Cosmetics. I did thick black liner to add drama and finished with mascara. This look was somewhat time-consuming based on the number of colors used, but I didn't spend too much time evening things out and making them look super-smooth because it was just kind of a fun look that I did for fun and not to wear anywhere (but it WAS inspired by the fact that pride was this weekend in my town.) It would have taken a really long time if I had taken the time to make everything really perfect and awesome, but I was really just playing around with the colors.


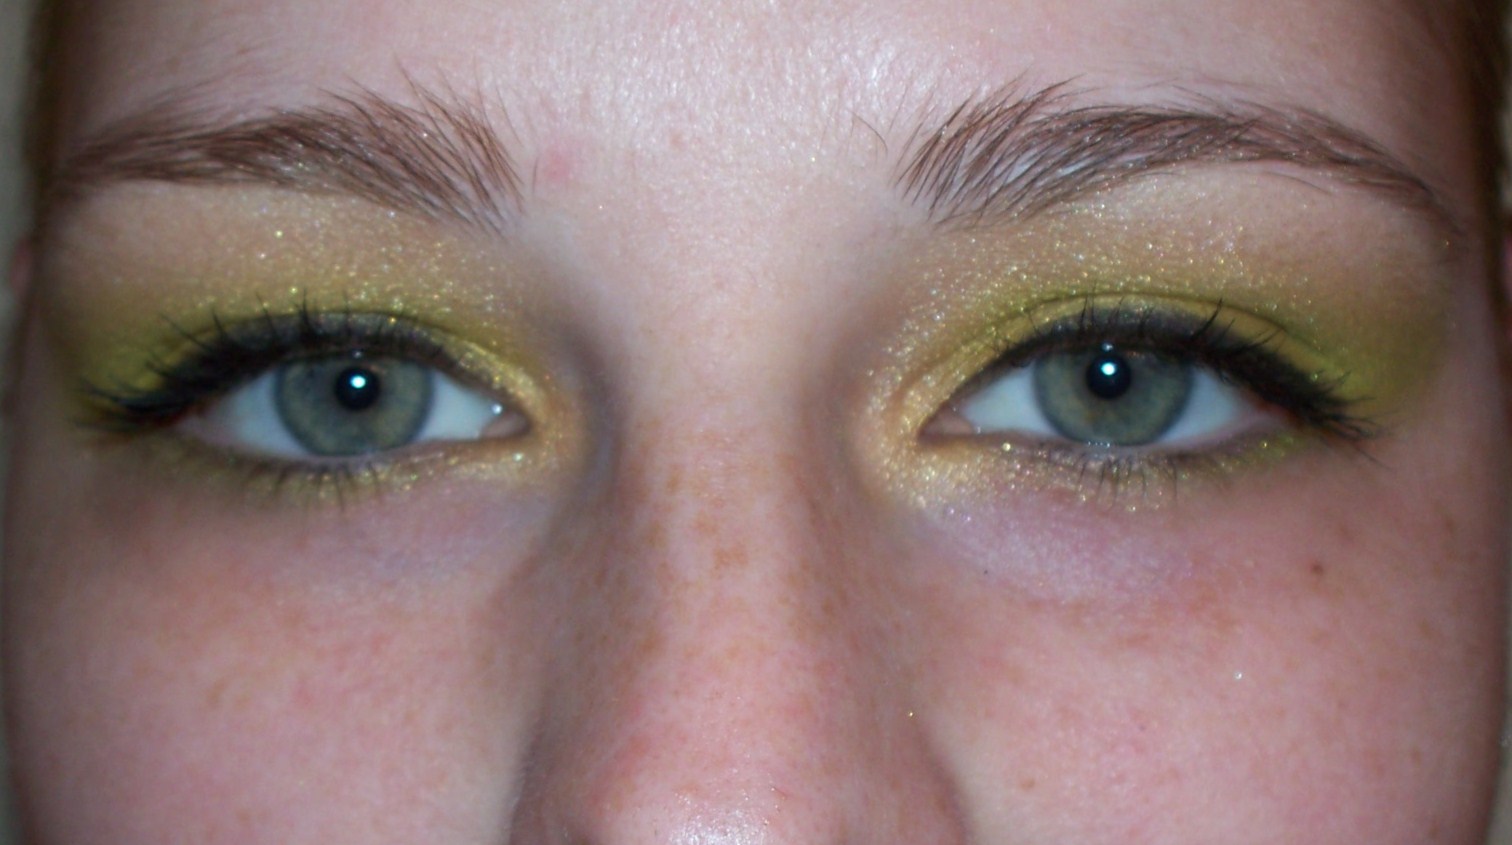
My next look, also primed with Shadow Poxy, uses Bouffant from Linnaeus Cosmetics as a highlight on the inner corners and under the brows. I used a little bit of Mondo (also from LC) on my lashline, blended upward into Caged Canary from Scaredy Cat Cosmetics (I'll edit the link later, but for now the link will go to her Etsy profile because her shop is in vacation mode.) I applied Chartreuse from The Starshine Company in the crease, blending thoroughly. Lastly, I lined with a thin stripe of black, and finished with mascara.



Thursday, June 9, 2011
Random Look!
This is a similar look to yesterday, but with more blending and different colors. All of the colors are from Scaredy Cat Cosmetics, with the exception of Lumpy Space Princess (which comes from Bokeh Face Cosmetics.) I started by priming with Shadow Poxy from My Beauty Addiction, then used Metamorphosis as a highlighter on the inner corners of my eyes and under my brows. Next, I applied Lumpy Space Princess to my eyelids and Mythic in my crease. I used Insomnia above my crease and on the outer half of my lower lashline. I lined with Mythic. I can't seem to take a decent picture from the front that doesn't look catty; I guess it's the shape of my face that does it because it doesn't look is like that in real life... *sigh*
Anyway, here it is.


Anyway, here it is.


Subscribe to:
Posts (Atom)
